This project was submitted by one of our readers, just like you.
How to Make a Round Handbag
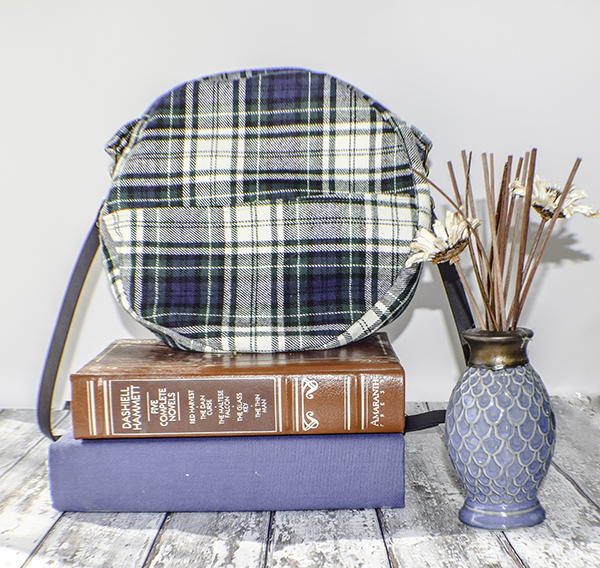
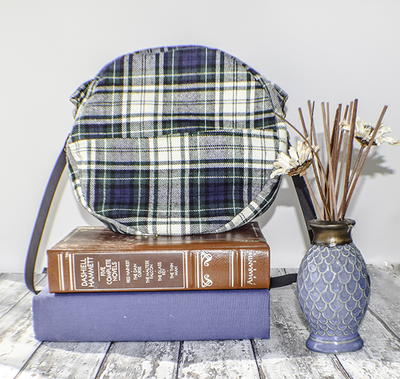
"This is a terrific chic little lined round handbag that can be made in an afternoon using confident beginner sewing skills. I love this little bag. You can make it as firm as you like by choosing different interfacing. This bag is the perfect everyday bag or evening bag depending on the fabrics that you choose. There is enough room in this bag for all of your bits and bobs. You can even make it larger or smaller if you like. "
Project TypeMake a Project
Time to CompleteIn an evening
Sewn byBoth Hand and Machine

Materials List
-
1 yd outer fabric
- 1 yd lining fabric
- 1 Yd Pellon 808
- 1 10" zipper
- Bag Handle
- 2 1" D-rings
Instructions
-
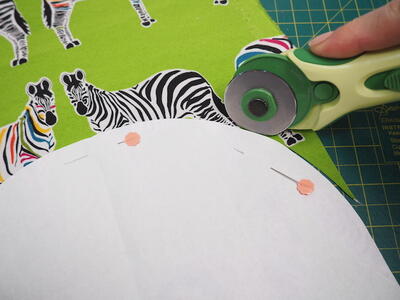
CUT YOUR FABRICS Using a compass or a 10" diameter plate cut two outer fabric circles, two lining circles and two interfacing circles. Cut one outer fabric half circle, one lining half circle and one half circle interfacing for the front pocket. Cut two outer zipper top sides, two lining zipper tops and two interfacing zipper tops that measure 10" x 2". Create the bottom of the bag by cutting one outer bottom, lining bottom and interfacing bottom that measures 24" x 4". Create two D-Ring tabs from the outer fabric that measure 4" x 4".
-
FUSE THE INTERFACING Fuse the interfacing to the outer bag pieces following the manufacturers directions.
-
CREATE YOUR ZIPPER Take your zipper sides and sew them right sides together with your zipper so that the zipper is centered with the sides. Do this for both sides of the zipper. Top stitch the zipper on both sides for a more professional look.
-
CREATE YOUR TABS Take the 4" x 4" squares and fold raw edges to the center and press. Fold in half again. Top stitch on both sides of the tab. Place the D-ring in the center of the tab. Place a tab on each end of the zipper and stitch.
-
ADD THE BOTTOM OF THE BAG Sew the bottom panel to the zipper panel right sides together using a 1/4" seam allowance.
-
ADD THE OUTER POCKET Fold the third outer circle in half. Top stitch on the folded edge and baste to one of the outer circles. Top stitch a line down the center to create two pockets.
-
SEW THE CIRCLES Clip one of the circles to the panel piece you just crated and stitch around the entire bag using a 1/4" seam allowance. Open the zipper and repeat for the other side making sure the the pocket is facing upward toward the zipper. Turn the bag right sides out through the open zipper.
-
CREATE THE LINING You will create the lining in the same way you created the bag except that you will not insert a zipper. You will start by folding the zipper sides over by 1/2" on one side of each zipper side and pressing. Stitch the zipper side lining to the bottom panel lining using a 1/2" seam allowance. Sew the lining circles to the lining panels leaving a 3" opening on one side for turning.
-
SEW THE LINING TO THE ZIPPER Place the outer bag inside the lining bag right sides together. Sew the turned under lining zipper sides to the underside raw edge of the zipper and clip. Sew the zipper side to just the top of the zipper not the sides. You will finish the sides off by hand.
-
FINISH THE BAG Sew the lining closed using the machine or ladder stitch. I like to use ladder stitch because it is invisible and is more professional. Turn the bag wrong sides out and ladder stitch the remainder of the lining to the bag. You will have to stitch at both ends of the zipper panel to the zipper. Add the handles and you have finished your new chic round handbag.
Read NextFoldable Tote Bag Pattern


