Thrifted Clothing Sewing Kit
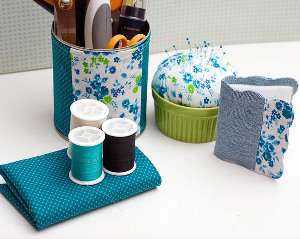
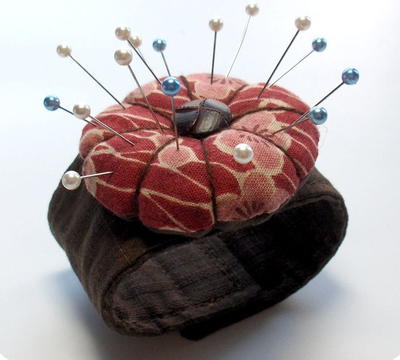
 If you have old clothing or fabric scraps lying around because you just like the print, this Thrifted Clothing Sewing Kit is perfect for you. This tutorial will show you how to take those old patterned fabrics scraps and turn them into a pincushion, a needle book, and a cover for an old can. With these handy objects lying around your craft space, you’ll always have your sewing tools at hand. Never lose your tools again with this recycled clothing sewing project. This DIY sewing kit comes complete with a needle book pattern, a fabric can to hold your scissors, and a how to make a pincushion tutorial.
Thrifted Clothing DIY Sewing Kit
Materials:
- Ramekin or other base for pincushion
- old clothes
- thread
- 1 sheet of craft felt
- large vegetable can
Find this pattern and more in the free eBook, 11 Sewing Room Ideas: How to Organize Your Room.
Instructions:
- Start by tracing a large circle on the back side of the fabric.

- Next, fold 2 sides of the circle toward the center, slightly overlapping them and stapling them several times. Stuff the fiberfill in under the staples. This needs to be very firmly packed so you will use a lot more filling than it looks like you should be using. To complete the pincushion, fold the rest of the fabric down around the ball of fiberfill and test it in the ramekin to get a good tight fit. Put hot glue in the bottom of the ramekin and firmly press the fabric ball down into the glue.

- The needle book was constructed using jeans and a shirt. Cut one 5 inch x 4 inch piece and one 7 inch x 4 inch piece from the jeans, and cut two 2.5 inch x 4 inch pieces from the shirt. Cut one 7 inch x 4 inch piece of fusible web.

- With right sides together and using a 1/2 inch seam allowance, stitch one of the 2.5 inch x 4 inch shirt pieces to each side of the 5 inch x 4 inch jean piece. Iron the seams open when finished.

- Follow the manufacturer instructions and use aniron to apply the fusible web to the wrong side of one of the panels. When it's cool, fuse that piece to the wrong side of the other cover piece.

- Next, fold the cover in half and placed it in the Fuse curvy square die (taking care to place the folded edge inside the cutting edge of the die to prevent the fold from being die cut) and run it through the Fuse.

- To complete the needle book, cut 2 pieces of felt to 5.5 inches x 3 inches, centered them inside the cover, and machine stitched down the center.

- The final part of the sewing kit is a large vegetable can for which you created a pretty cover. Use the measuring tape from the Sew Taxi, measure the circumference of the can and divided the number by 4 since you want to use 4 panels. Measure from top to bottom of the can. Add 1 inch to both numbers to allow for seam allowances and cut 2 pieces from the shirt and 2 pieces from a coordinating fabric.

- Using a 1/2 inch seam allowance, stitch the 4 panels together. Hem the top and bottom edges 1/2 inch. Complete the can cover by stitching together the 2 ends of the fabric panel and slip it over the can.

Read NextFree Bucket Hat Sewing Pattern

