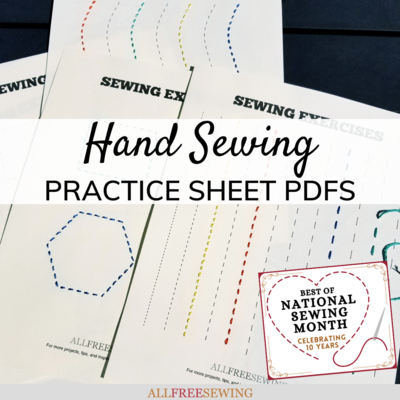
How to Read a Sewing Pattern
Reading sewing patterns doesn't have to be intimidating! Learn how to understand sewing patterns and the symbols used with these sewing pattern tips.

If you have ever looked at a sewing pattern, you probably know how much information is packed into those small packages. From the type of pattern, materials needed, instructions, the pattern, and so on, it's not easy to know how to read a sewing pattern.
The good news is that you get a lot of information to work with, from written and illustrated instructions, tips, alteration guidelines, and more.
The not so good news is that reading a sewing pattern can be overwhelming for even the most experienced sewists.
Fortunately, vintage and modern print sewing patterns, along with digital patterns all have similar information.
When it comes to sewing basics, you will want to learn how to read a sewing pattern as one of the first things you figure out.
It's important to learn how to understand a sewing pattern because sewing a dress, a pair of pants, shirt, or other items is a process that takes time, energy, and money that you don't want to lose.
Even though every pattern has a particular set of instructions, sewing symbols, and notes, these sewing tips and tricks for patterns will help you gain knowledge to be prepared for your next project.
Sign Up For More Free Patterns >>>
Below, you will find one of our popular videos on how to read a sewing pattern as well as written instructions and pictures.
Then, learn all about pattern symbols you will find on your sewing projects. From the grain line to the zipper markings and everything in between, you'll know exactly what all of the details on a pattern mean.
Table of Contents

Sewing Pattern Tips Video Tutorial
One of the biggest challenges you will come across as a brand new sewist is figuring out how to read a sewing pattern. Unlike many other beginner tutorials, sewing patterns come with a whole new set of symbols and words that can throw a newbie off.
Before trying to sew with your first store-bought sewing pattern, check out this video tutorial.
Applicable to both digital and traditional sewing patterns, this sewing video shows you how to read the back of your pattern for sewing requirements, offers tips on reading step-by-steps, as well as explains what all those little marks on a sewing pattern mean.
Click the play button to watch the video right below to learn more from Angel. Then take a look below for written instructions, tips, and tricks for reading patterns.
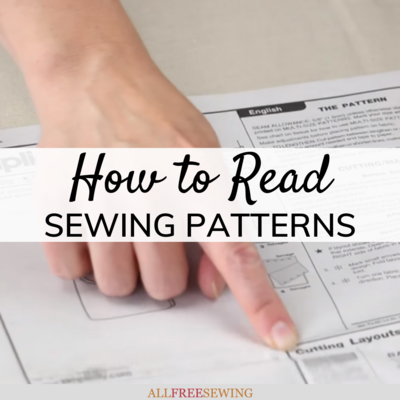
How to Read a Sewing Pattern
Sewing 101 involves knowing how to follow a sewing pattern with precision. We have some tips and tricks for deciphering your store-bought patterns.
Every part of the pattern is needed, from the back of the package, the instructions on the inside, along with pattern symbols and terms explained, and the actual pattern.
Overview:
- Turn to the back of the pattern for materials.
- Read the Instructions.
- Cut out and look at the pattern template.
-------------------------------------------------------------------
- How to Read a Sewing Pattern Envelope: Turn to the back of the pattern for materials. The back of the pattern has everything you need to know as far as materials: the fabric type, amount, and any notions that you will want to have before starting. On a clothing pattern, it will show the measurements and sizing.
Tips:
- Pay attention to the measurements over the size as brands all have different sizing rules. It will tell you how much fabric you need for specific measurements.
- Use the type of fabric suggested unless you know exactly how the particular fabric you're using works in the same pattern.

- Read the Instructions: It is very important to read the entire set of instructions before beginning. The full pattern will include vital information such as details of the pattern, cutting and marking, layouts, alternations, symbols, and images.

- Look at and cut out the pattern template: Pay close attention to the symbols and marks on the pattern before starting. Although each pattern house has slightly different ways of explaining and showing pattern details, the explanations should be available in the instructions.

How to Read Sewing Pattern Symbols
To make learning this even easier, check out our sewing pattern key. Sewing pattern symbols vary slightly by pattern brand or designer but most of them have similar appearances and meanings. Always read in order to understand the symbols from the pattern you are using before starting.
Learn the sewing symbols and what they mean to help you understand patterns better. The most common symbols are listed and shown below:
- Adjustment Line: Usually shown as two solid parallel lines, this symbol indicates where best to lengthen or shorten the pattern piece.

- Cutting Line: Shown as a solid line, often with scissors to represent the cut, this symbol is shown on the edge of the pattern template and tells you where to cut.

- Fold Line: This is also referred to as the Solid Line or Place on Fold Line. Both the name and symbol vary slightly but it usually looks like a solid or dashed straight line with a bracketed line above with two arrows on each end pointing down to the line.
This symbol represents the edge piece of fabric that is aligned with the fold. The line indicates the fold. The fold should not be cut as that would cause problems when you try to attach this piece of fabric with the other half of the piece.

- Grain Line: This symbol appears as a solid line. It can show an arrow on one or both ends. This is usually the first symbol you will see listed on your pattern. It indicates in which direction you will cut the fabric, following the grain line lengthwise. The grain line will always be parallel to the selvage unless otherwise noted.

- Seam Line: Also known as the stitching line, this symbol is shown as a simple dashed line a majority of the time, and it indicates where you sew two pieces of fabric together. There are sometimes arrows showing which direction to go.

- Center Front and Center Back: Used for alignment purposes, this symbol is represented as a straight line comprised of dashes and small dots. The center front runs vertically on the front of the pattern and the center back runs vertically on the back of the pattern.

- Darts: Related to the dots, squares, and triangles, this symbol is often shown as a V shape with a dashed straight line coming from the center of the V point and out. This marks where to fold and stitch the piece for curves, allowing fit for a body.

- Dots, Squares, Triangles, and Other Shapes: Sometimes simply referred to as "symbols" on some patterns, these markings show you where to match parts of your sewing piece together.

- Hip and Bust: This circle with two perpendicular lines inside (like a plus sign) represents the hipline, and bustline, as well as the waistline, and biceps when appropriate for garments.

- Pleats, Tucks, Gathers: These symbols vary but will always be explained in a professional pattern, so pay close attention. Pleats are usually shown as circles at the corners or ends of lines.
The tuck symbol is often related to the dart symbol and is usually shown with an arrow pointing to the tuck point. The gather symbol is usually a wavy line sometimes with arrows and other markings to indicate instructions.

- Notches: Shown as diamonds and triangles combined with lines, these symbols represent matching seamlines.
Often, one diamond/triangle indicates the front of the sewing piece, two diamonds/triangles indicate the back of the piece, and three diamonds/triangles indicate another place on the garment.

- Button and Buttonhole Marking: These are two different symbols but one goes with the other. The button marking looks like a round button and the buttonhole marking is usually a straight line with perpendicular notches on either end (and should be true to size).
Sometimes there is an X shown on the line where the button will be sewn. You will construct the buttonholes on the opposite side of your piece.

- Seam Allowance: This symbol is commonly shown as a ruler with fraction markings although it can also be a line or two with the fractions shown at the side as well. Sometimes the fraction is mentioned separately from the symbol.

- Zipper Marking: Usually shown as a straight line with an arrow on either side at opposite sides pointing to the line. This symbol is only used if the garment you are sewing includes a zipper.

Sewing Pattern Symbols Infographic (Downloadable PDF)
For a handy savable and printable version of the most common symbols used in sewing patterns, click the button below to download this helpful PDF.
With this handy guide, you will know the names and the general look of symbols found in sewing patterns.
Click Here to Download
the Sewing Pattern Symbols PDF

Now that you have learned the nuances of reading a professional sewing pattern, here are some easy sewing pattern ideas to help you get started on your sewing journey.
With a variety of ideas with easy-to-follow instructions, you will be able to begin with a simple sewing project you are interested in and then work up to more difficult sewing patterns.


Want More?
How to Sew with a Sewing Machine >>
What other symbols have you seen in sewing patterns?
Let us know in the comments!
Your Recently Viewed Projects
Thanks for your comment. Don't forget to share!
Lynn K
Nov 28, 2018
Another excellent and very practical tutorial from All Free Sewing - thank you! When I started sewing reading a sewing pattern was rather like reading a Greek book, in Greek! A detailed useful list of info like shown above would have made life so much simpler. Our teenage daughter is just learning to sew so I have printed this tutorial and stuck in on the wall at her work table.
Weberme
May 15, 2018
Anyone learning to sew needs to see this video or tutorial to learn how to read a pattern the right way. It has some great information on how to find the right way for a perfect fit on your garment and how to read what is on the back like straight grain. This is a very well done tutorial by Angel.
Report Inappropriate Comment
Are you sure you would like to report this comment? It will be flagged for our moderators to take action.
Thank you for taking the time to improve the content on our site.