This project was submitted by one of our readers, just like you.
Circular Bag
"Large enough to hold four corn hole bags, tons of makeup, sewing materials, pretty much anything you need to carry around or have in one place. Best size BUT just in case your looking for smaller bag, dimensions are added. Just know: smaller the bag, less room and more difficult to sew. My biggest tip with any project is always to remember to back stitch! Strength in the stitch!"
NotesYour first project doesn't have to be perfect. You making it is what matters. Your next will be even better!
Project TypeMake a Project
Time to CompleteIn an evening
Sewn byBoth Hand and Machine

Materials List
- 6" x 21" thicker fabric of choice design (I used duck cloth)
- 6" x 21" thicker fabric of choice design (I used duck cloth)
- 11" x 21" thiner fabric of your choice for inside of bag (I used cotten)
- 7" x 7" same soft and light weight fabric (I used cotton)
- 7" x 7" same thicker fabric (I used duck cloth)
- 30" ribbon of your lovely choice
Instructions
-
Take a look at the finished product and choose witch fabric you want where. The fabric for the top and bottom you need to cut into 4" x 21" and 2" x 21". Cut the two 7" x 7" squares into two circles that are 6.5" in diameter. I did this with my self healing cutting mat but you can do this by folding the squares 3 times (such as in picture above), measure out 3.25" and cut in quarter circular motion. In this picture to the right you see an additional piece of fabric at the bottom, across the circles. I had decided to make my own ribbon at the time and it came out pretty well. If you decide to do the same then at the end of the "How To" I will show you how to do so. If not then skip away.
-
Sew the outer pieces together following the picture to your right. I used 1/4" seams instead of the normal 1/2" seams. Press the seams with an Iron.
-
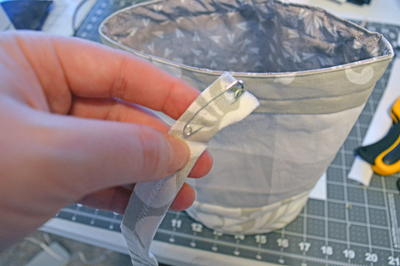
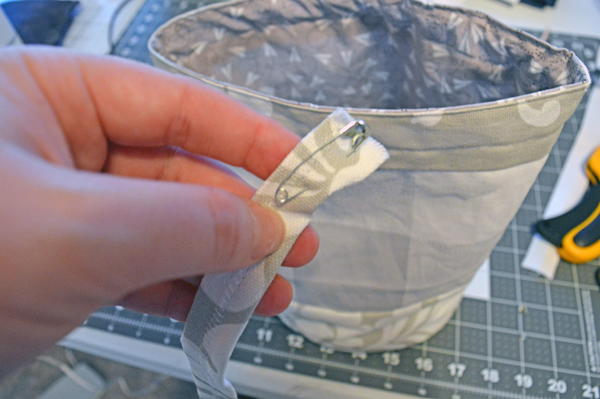
Fold so the pretty and short sides of the fabrics are facing each other. INSIDE LINING FABRIC : Sew along the short side to make the fabric into tubes. OUTSIDE FABRIC: Starting from bottom, sew along short side to make the fabric into a tube BUT stop 3" from top and backstitch. Leave a 1" gap and sew remainder (by hand or with machine) from gap to top. Press the seams at the gap location away from the hole. Hand sew short lines (such as picture above) to secure the gap location. This gap is where your ribbon will enter.
-
This is the fun..... part. Sew the circles onto the bottom of the tubes. I use pins to keep everything together, in place and correct. You can use as many pins as you would like. I do recommend at least four at every corner. Sew the circles to the tubes... easier said then done. Do this at a slow speed and ensure the underneath side layer does not get caught up under the needle. Your first time may not be perfect but it only gets easier the more you do this same thing. For future products know that the smaller the tube the more difficult the sew.
-
Awesome job on the tubes! Remember this is your first tube sewing and my first one was... well.. not so pretty. :) Now, keep the inside lining tube inverted (wrong side out) and place the outside tube (right side out) inside it. Keep the seams together. Sew along the top of the tubes and ensure to leave a 2" gap for turning it inside out.
-
Use that 2" gap to turn the bag righht sides out. Step back and feel the excitment of starting to see the finished product. :) Press the top of the bag with an iron. Stich around the top of the bag including the gap that was left. Also, stich both sides of the ribbon hole to create a channel for the ribbon to follow.
Read NextThe Lauren Bag Pattern


