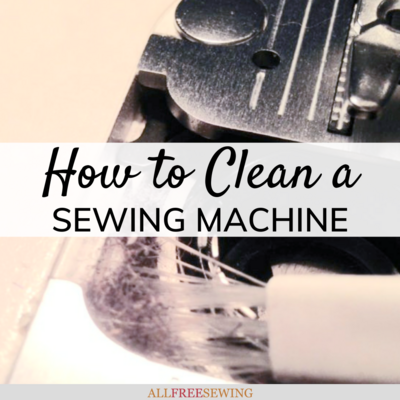
How to Clean a Sewing Machine: Sewing Machine Maintenance
 If you want to avoid a lot of costly repairs and sewing machine maintenance outside of the home, be sure to learn how to properly clean your sewing machine.
Keeping the innards of your sewing machine clean can save you lots of time and money. A clean machine is a happy machine and will break down less frequently. If you are looking to learn how to clean a sewing machine, you have come to the right place.
This complete guide on sewing machine maintenance 101, How to Clean a Sewing Machine, has everything you need to know about cleaning your sewing machine and keeping it clean. Just take a look at the advice, tips, tricks, and tutorials below to get your machine in the best shape possible.
Caring for a sewing machine is just as important as learning to sew. If your machine isn't kept in tip-top shape, it won't last as long or run as smoothly. Luckily, there are a lot of little things that anyone can do to keep it going.
Sign Up For More Free Patterns >>>
Sewing Machine Maintenance:
How to Clean a Sewing Machine
Table of Contents
When to Clean Your Sewing Machine
How to Clean Your Sewing Machine: First Steps
How to Clean Your Sewing Machine (Inside & Out)
When to Clean Your Sewing Machine
You should clean your sewing machine every three months or so; sooner if you are an avid sewist. If you spend a lot of time sewing, you need to clean your sewing machine more often. Buildup and grime in the machine comes from continually running fabric and thread through your machine.
Each time you sew little particles fall off of the fabric and thread, falling into your machine and collecting over time. So, if you sew for hours a day, there will clearly be more build up. It is best learn how to clean your sewing machine even if you do not sew all that often. It can save you plenty of time.
If you are wondering when it is time to clean a sewing machine, your sewing machine will usually tell you when it is in need of a good scrub. Just like you know when you need to take your car into the shop, your sewing machine will start to slow down or lag a bit when it needs a deep cleaning. All of that buildup really affects the mechanics of the inside of the machine. When your Singer starts to slow, it is time to open her up and tidy up.
How to Clean Your Sewing Machine: First Steps
Since sewing machines are heavy equipment with sharp needles, it is important to keep your safety in mind when sitting down to clean your machine. Take the following precautions to ensure the process is safe and stress free.
- The number one rule when learning how to clean a sewing machine is to clean the machine when it is turned off. Unplug your machine and the pedal before doing anything else. This way the machine cannot activate and injure you or do irreparable damage to itself.
- Have all of your tools ready to go before starting. You want to do this all in one sitting. You will need a brush (specially bought for sewing machine cleaning or a toothbrush works, too), a screwdriver, canned air, and an hour or so.
- If you are nervous about taking apart your sewing machine, take photos along the way. That way if you find yourself flustered while reattaching pieces, you can refer back to those photos.
- Have somewhere to store small pieces. The screws on sewing machines are tiny. If you are taking it apart, you do not want to lose them. Either plan on keeping them attached to their respective parts or grab a bowl to tuck them into so they cannot roll away. If you are going to keep them attached, taping them down with some clear tape can ensure that they do not pop out and roll away.
- Remember to cover your machine when you are not using it. There is no reason to let the dust settle on your machine when you are not using it.
How to Clean Your Sewing Machine (Inside & Out)
Materials:
- Your machine
- A brush (a toothbrush works)
- Canned air
- Newspaper/scrap fabric
- A well-lit area
- Clear tape (optional)
- Camera (optional)
1. Gather all of your tools and prepare your space. You will need a clean table in a well-lit area in order to properly clean your sewing machine. Lay down newspaper or scrap fabric if you are afraid of scraping or dirtying your table.
2. The first step in learning how to clean a sewing machine is learning how to take your machine apart. You need to clean the insides of your machine meaning you need to get inside your machine. The best way to do this is read your manual.
3. Once you have a handle on how your machine works, take it apart. Make sure to keep ahold of your screws and smaller pieces. You can either take apart your whole machine or clean it piece by piece. You need to clean the space under your needle plate way more often than you need to clean the remainder of your sewing machine.
4. Take your canned air and blow, point it towards the biggest pieces of built-up gunk. Be sure to try to point the air away from yourself and angled out of your machine.
5. Once you have sprayed all of the dust bunnies from your machine, use the brush of your choice to brush all the remaining dust out of your machine. You can buy special tools, use a thick paintbrush, or even just employ a toothbrush to do all the work. Remember to frequently clean the brush and toss away the gunk.
6. Wipe down your machine with a dry cloth to make sure you remove all the dust you can before reassembling.
7. Reassemble your machine. Remember to be extra careful and put it back exactly how you found it. Look to your manual or photos you took earlier for reference.
8. Once your machine is spick and span, consider wiping down the exterior, as well. With all that dust around, it might be extra dirty. Plus, you can never be too clean!
9. Clean up the space around your machine, as well. You just took the time working on how to clean your sewing machine, why not take the extra fifteen minutes to clean up your sewing space?
10. Get back to sewing!
Be sure to check out all the other Tips & Tricks for more sewing advice!
Read Next50+ Sewing Crafts That Sell Well
Your Recently Viewed Projects
Thanks for your comment. Don't forget to share!
buzzybee
Feb 18, 2019
Use canned air ONLY on pieces you have removed entirely from the machine. Never point the air nozzle into the machine. Also, when you clear out the "gunk" you are removing oil. Always oil your machine when you clean it. Newer machines with electronics (1990 or later) should only be oiled at the points identified in the manual. Never take apart electronic parts or remove them from the machine.
quiltenlady 205741 9
Feb 06, 2019
I too have been told never never use canned air.So either change this article so you don't ruin someone machine .If a person is not sure how to clean your machine then leave it for your Dealer or you will have to pay more for something you either lost or break or they have to put it back together.Leave but for the dealer and no canned air !!!!
Lynn K
Nov 28, 2018
My machine is in use almost every day so I do clean it at least once a month. I'm not sure that I would be brave enough to take it apart, clean it and put it together again especially since I have no idea which parts may require lubrication, replacement or something done to them. For a more intensive clean I take it to Johan, my wonderful sewing machine maintenance man, for an annual complete service.
buzzybee
Feb 18, 2019
Very wise. Older machines have grease fittings, newer ones are sealed and should never be opened. Opening voids the warranty. So many functions are electronically controlled, you should never just dismantle parts under the guise of cleaning.
GrandmaSue10
Oct 29, 2014
I wanted to comment on cleaning your sewing machine: before you sew wash your hands and make sure your carpet or hard floor is clean. You drop pieces sometimes or if you have a project like a long skirt, it will touch the floor.
sbird 2102644
Jun 26, 2014
I have been told over and over to NEVER use canned air on the cleaning of my machine, saying that those dust bunnies can log in area's and later cause trouble with your machine, now you have me confused.
AllFreeSewing Edit or AR
Jun 27, 2014
Hi! Sometimes it is not recommended to use canned air as it can force dust into places it should not go. This is why we recommend angling the air away from the machine to insure that it is blowing the grime OUT of the machine and not INTO the machine. If using this makes you uncomfortable, you could do all of this manually with a brush or use your vacuum. Some manufacturers sell kits to attach to your vacuum, as well. Hope that helps! Kaylee, editor of AllFreeSewing
Report Inappropriate Comment
Are you sure you would like to report this comment? It will be flagged for our moderators to take action.
Thank you for taking the time to improve the content on our site.