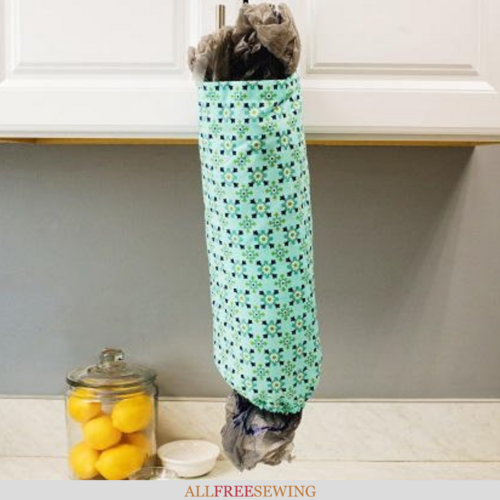
Easy Plastic Bag Holder DIY
Want to DIY a plastic bag dispenser? Learn how to make one with this video tutorial.
Perfect for beginners, this Easy Plastic Bag Holder DIY is a no-fuss project that you'll use for years to come. With this helpful video and written tutorial, you can create a handy bag where you can store all of your plastic bags in one convenient spot.
You've probably never met a person who didn't have a pile of plastic bags stuffed somewhere in their home. They seem to multiply like tribbles and it can get overwhelming. Not with a plastic bag holder like this to keep them consolidated.
Plus, the fun fabric on this bag will cheer up your kitchen, so you can keep your space looking nice and also have an easy place to keep unsightly plastic bags. This bag only requires a fat quarter, which is perfect for any sewists looking for a quick stashbusting project.
Once you follow this tutorial and how to make a plastic bag dispenser, you'll see how easy a sewing project it is, particularly that it's great for beginners and experts alike.
Sign Up For More Free Patterns >>>
Fabric Grocery Bag Holder Video Tutorial:
One of the reasons that this Plastic Bag Holder DIY is ideal for any skill level is this easy-to-follow video tutorial along with the written tutorial below. Click the play button to watch Angel walk you through making this bag holder and then scroll for more below.
This browser does not support the video element.
How to Make a Plastic Bag Dispenser:
Project Type: Make a Project
Skill Level: Beginner
Time to Complete: In an evening
Sewn By: Machine
Materials List:
- 1 18 x 22 inches or a fat quarter
- 1/4 inch wide piece of elastic for the bottom opening
- Rotary cutter and mat
- Ruler
- Seam measurer
- Sewing machine and notions
Instructions:
- Cut 3 inches off the fat quarter from the longer (22 inches) side. Take the cut piece and fold it in half. Cut. Sew together with a 1/2 inch seam allowance. Turn right side out.
- Press. Take the end of the pressed tube and fold in one open side about a 1/2 inch to hide the raw edges. Press the fold. Repeat for the other open end. Set aside.
- Zig zag stitch all the way around the larger piece/remaining fabric.
Fold the two long sides together, right sides together. Turn one side up 1/2 inch and press. On the opposite side, turn up 1 inch of fabric, and press.
- Unfold the pressed sections and sew into a tube, using a straight stitch and 1/2 inch seam allowance (pin if needed to hold). Turn folded/pressed sections back down.
- Sew closed the top section (straight stitch all the way around).
Note: this is the 1/2 inch folded side.
- Sew closed the bottom section (straight stitch, all the way around with a gap on the side of the seam left open for the elastic).
Note: this is the 1 inch folded side.
Insert a piece of elastic that's about 5-6 inches long. Sew the two ends of elastic together using a zig zag stitch and locking the stitches. Sew the opening for the elastic closed using a straight stitch (do not sew into the elastic).
Note: Use a safety pin to work it through the hole if desired. Also, make sure that the end doesn't get lost inside.
- Sew loop onto top along the edges using a straight stitch (pin in place if needed).
Want More?
14+ Reusable Grocery Bag Patterns >>
Do you save your plastic bags to use again?


