Felt and Fabric Snow Globe DIY Ornament

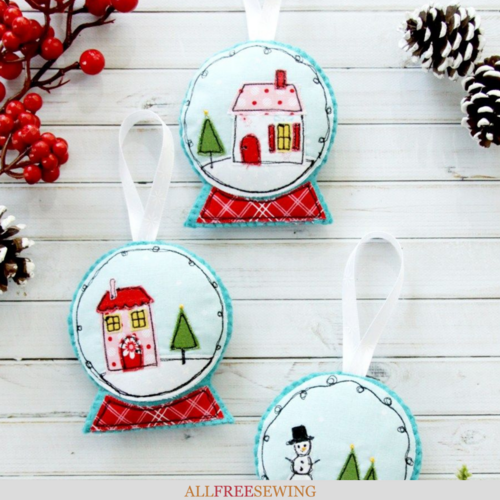
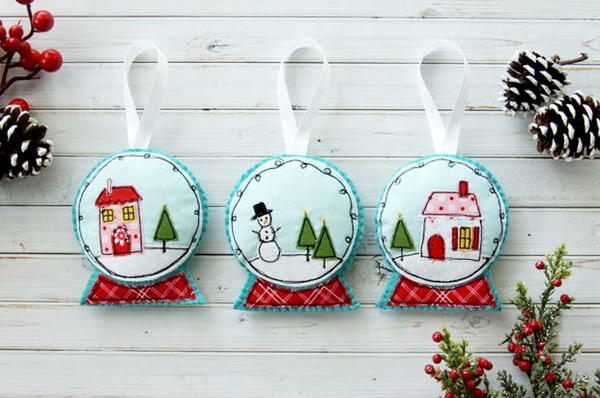
Create your own mini winter wonderland by showing off your creativity and your embroidery skills with these pretty Felt and Fabric Snow Globe DIY Ornaments!
Guest blogger Beverly McCullough is here to show you how to create festive DIY Christmas ornaments using felt, scrap fabric, and a sprinkle of charm.
Complete with step by step images, this Christmas sewing tutorial is a great way to work on your embroidery skills and is a fun project for teens and tweens just learning how to sew.
Have yourself a merry little Christmas with these adorable DIY ornaments the whole family will love.
Sign Up For More Free Patterns >>>
Be sure to check out Beverly's blog, Flamingo Toes, for even more fun embroidery and sewing projects and patterns!
Hello AllFreeSewing readers! I am super excited to be here as part of National Sewing Month! My name is Bev and I blog over at Flamingo Toes.
I love sharing sewing and embroidery projects and these sweet ornaments are a little of both! They are like a little Fabric and Felt Snowglobe Ornaments village! You can make up one or the whole little set - and they'd be perfect on your tree but they'd be so cute as gift toppers too!

I made these with a combination of fabric and felt and I used free motion stitching and just a tiny bit of embroidery. And because they're so small, it takes just a few minutes to stitch each one up!
So let's dive in!
Finished ornament size (not including ribbon) 3 1/2" x 3"
Materials: (per snowglobe)
● Small scraps for houses, trees, snow, etc.
● 5" x 5" fabric piece for each snowglobe background
● Small fabric piece for base of snowglobe
● Felt pieces for front and back of snowglobe - 8"x4"
● HeatnBond Soft Stretch fusible webbing
● Thermoweb Fusible Fleece - 8" x 5"
● Small bit of fiberfill
● DMC Embroidery Floss - black, orange and color to match your felt
● 8" piece of ribbon
● Snowglobe Ornament Patterns
Start by cutting out your little paper patterns. Cut fabric pieces for each piece, but larger than each paper piece. Iron a piece of fusible webbing to the wrong side of each fabric piece. Cut out each of the pattern pieces for your snowglobe except for the blue background piece. Leave that one uncut and without fusible webbing.
Lay the blue background fabric over the snowglobe layout pattern. Remove the paper backing from the snow base and the tree. Iron these in place. Using your free motion foot, stitch around each piece twice, just inside the edge of the fabric.
Using the pattern layout again, place the house in on the background fabric and iron in place. Iron on the doors and windows as well. Sew around everything twice and sew in window dividers as well.
Sew on the roof and chimney to finish off the detailing of the snowglobe.
Iron fusible webbing to the back side of the background fabric. Cut out the circle for the top of the snowglobe. Iron the top and base of the snowglobe to the felt background piece. Sew around the pieces twice, adding in little swirls in your stitching on the top of the snowglobe.
Repeat for the other snowglobes in the set! The snowman has a little embroidered carrot for a nose and French Knots for eyes and buttons. I added gold French Knots for stars at the top of all the trees.
Iron a piece of fusible fleece about 1/4" smaller than the back felt piece to the back piece. Iron a circle 1/4" smaller than the front circle to the back of the front felt piece.
Place the two pieces wrong sides together and stitch together with a whip stitch using 1 strand of matching floss. Add in the ribbon and stitch through that as your go around the top. Before you close it up, add in a small bit of fiberfill in the center.
And you're all done! I hope you have a blast sewing these up!
I'd love for you to stop by and say "hi" at Flamingo Toes! I have lots more sewing and embroidery projects and fun Christmas things too!
Be sure to stop by Beverly's blog, Flamingo Toes, to find more of her fun craft and sewing projects!
What's your favorite holiday tradition? Let us know below in the comments!
