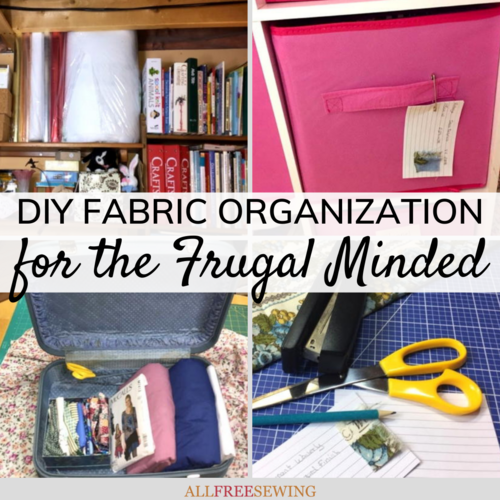
DIY Fabric Organization for the Frugal Minded
Keep your sewing space organized and tidy with this list of organization ideas from guest blogger Ann Strecko Koeman. DIY Fabric Organization for the Frugal Minded shows you how to store your fabric while keeping your sewing budget in check!
If you have too much fabric and are tired of your sewing space looking like a complete mess, then Ann's article on fabric organization is the perfect way to stay organized while you sew.
Take it away, Ann!
Over the years I have collected, and yes, hoarded materials of all types for a variety of sewing projects. Storing those textiles has sometimes proven to be a challenge, but one that I welcomed.
You see, not only do I love to make stuff, and collect supplies, I also enjoy organizing, and reorganizing my stash. Visit my blog AnnMakes to learn more. Throughout the years, I have tried different methods of organizing and storing all those pieces of fabrics while being frugal.
Sign Up For More Free Patterns >>>
DIY Fabric Organization for the Frugal Minded
The best ways to organize any fabric stash depends on a few factors. How big is the stash? How much space is available? What is the budget? What type of sewing projects are planned?
Today I will share my tried and true small budget methods for storing and organizing my growing collections over the years, as well as other systems I have yet to try, and hopefully, some of these ideas will help you out.

I learned to sew from my mom when I was four years old, and I was enthralled. My love of making dresses for my dolls, and designing my tote bags to carry my books to and from school led to my obsession with having the best wardrobe any high school girl had! I concluded that creating my clothes was much more affordable, and guaranteed better quality made garments.
That was true for so many years, as my mom had taught me well on where and how to purchase the best textiles and notions, at the best prices. I was already adept at repurposing the materials from hand-me-downs from family and neighbors!
In the first years following elementary school studies, I limited my collection of supplies to one project at a time and usually kept everything in one store bag, until the project's completion.
Later, I started down the road of purchasing quality fabrics at low prices by the pound from farmer’s markets! No joke! At the same time, I collected the cleanest and sturdiest cardboard boxes I could get from the local grocery store.
Needless to say that from a very young age I knew it was better to save my money to purchase the best materials I could and be thrifty with the storage!
Methods of Organizing Fabrics on the Cheap— The Tried and True
- Use empty boxes. These can be clean moving boxes or boxes that once held office supplies. They can be made of cardboard or even better, plastic. Never overlook the regular box. It does not matter what the box once held, or whether it is brand new!
The important part is how clean and sturdy that box is. I prefer boxes that have removable lids or have a top and a bottom box that fit into each other. For example, many produce boxes look like one solid closed box but the upper part can be lifted up, and the bottom part looks almost the same.
- Shelves. On a wall, in a cupboard, or perhaps a closet. I am the type of girl that can never have enough shelves or boxes. From repurposing old bookcases to building a shelving system from boards and bricks, or even milk crates, I have used them all!
- Repurposed furniture. What once held grandma’s dresses could be updated and some shelves installed inside that old wardrobe. Or maybe you no longer need a cabinet for the television since you got one of those thin screen TVs that mounts on a wall! I have done both!
One of my current fabric cupboards used to belong to my maternal grandmother. My other cupboard was in the basement of my stepfather’s cottage for years and once held his sibling's clothing as children. As for the TV cabinet, well, I just tore one apart and used the materials for shelving in the old wardrobes.
- Empty suitcases. While you are home, store fabrics in your empty luggage. Just place all the supplies inside a plastic bag before packing or unpacking. Worked perfectly for me when I was living in a tiny dorm in university!
- Have bolts of fabric to save? If you have an open ceiling in your basement, look up. Those cross beams and floor supports are hidden gems for storage. A method I realized possible when I ran out of room in my current cupboards!
- Got an average budget? Purchase inexpensive closet shelving, or bookcases during back-to-school sales. Ok, I bought the cubbies I currently use from a department store, and not in September. In my defense, they were a good deal as delivery was free!
Other Methods I Wish I Had Thought of Way Back When
- A thrift store filing cabinet? Use hanging files and organize your stash. A system I spotted on Pinterest just after I gave away an old office cabinet! I now see it as a very efficient and space-saving solution.
- Hanging yards of fabrics using coat hangers in a closet. That idea came to me after I saw a relative storing an extra table cloth in the same manner. Such a simple idea.
Organizing Large Fabric Collections
Now to organize one’s stash when you have more than what fits in just one container or on one shelf.
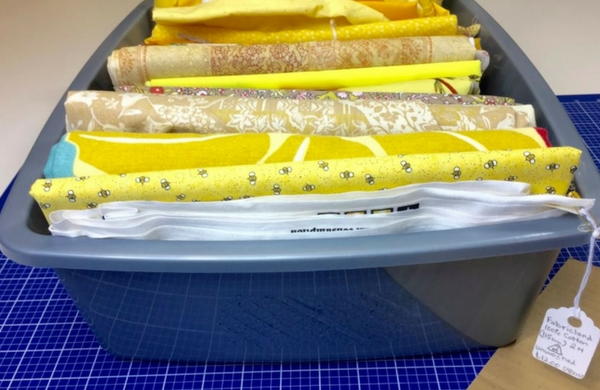
1. Sort fabrics by color. You can go with the colors of the rainbow, or by primary, tertiary, and neutrals. I like the rainbow method and end up mixing cools and warms together. If you have an extensive collection, sort also by type of material. I have large quantities of fleece, so I keep those separate from my fashion and crafting textiles.
2. Fold, or roll, each piece into manageable widths that will fit neatly in the storage system you are using. I like to make a template using recycled cardboard, by measuring the width and height of the container or shelf area. Then, I use that piece to fold the fabrics.
3. Label, label, label. Mark the contents of the box, cupboard, bin, etc. Include information about each fabric. Attach tags with safety pins, or clip fabric swatches to an index card. Such as type, amount, washing care, width, where you bought it, and any other pertinent information.
In Conclusion
To see how I organize in my crafting space, check out my craft room tour! (You can find Ann's YouTube channel here)
I also share a lot of DIY storage ideas on my blog! You can find more of Ann's fantastic craft projects on her blog, AnnMakes!
How do you keep your fabric organized? Let us know below in the comments!

