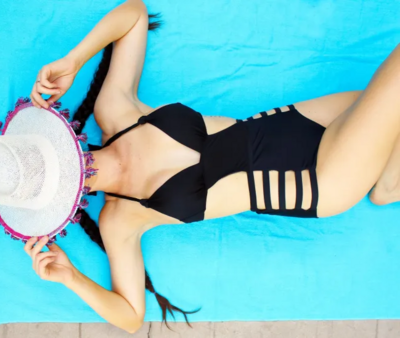
DIY Monokini From An Old Bikini Set

From the Blogger: "If you’re anything like me, you probably love the look of a monokini, but finding one that fits just right can be a major challenge. In today’s tutorial, I’ll walk you through how to transform a basic bikini you already have into a sexy, perfectly fitting DIY monokini. The secret to getting the perfect fit is in measuring your individual abdomen and making the swimsuit match. With regular swimsuit shopping, it’s always the other way around."
Project TypeMake a Project
Time to CompleteUnder an hour
Sewn byMachine

Materials List
- An old bikini
- 12″ x 12″ Square of nylon lycra swimwear fabric
- Sewing machine or serger
- 3/8″ Clear Elastic
- Dressmaker shears
Instructions
-
The first step is to decide how wide you want the connecting piece of fabric to be on your DIY monokini. Use a measuring tape to decide how wide you want your connecting strip to be.
-
Once you have that measurement, put your bikini on and use a measuring tape to decide how tall the height of your square should be. Find this measurement by holding your measuring tape at the top of your bikini bottoms (where your stomach starts to show) and the bottom of your bikini top. Trim your square to match these measurements.
-
Next, fold the small piece of fabric in half lengthwise and cut to create a curve (if you want).
-
Now, it’s time to add some elastic to the sides of your monokini piece. this step creates a more finished edge once your swimsuit is complete. Use a serger or a criss-cross stitch on your sewing machine to sew the elastic to the long sides of your fabric.
-
Now pin the bottom of your piece of fabric to the bottom of your bikini with sewing pins. Sew it into place using a serger or criss-cross stitch on a basic sewing machine.
-
Now use your sewing pins to attach the top of your bikini to your monokini piece of fabric. Sew it into place using the same method.
-
Ta-da! You, my friend, are DONE, and now you have a cute, flattering, well-fitting DIY monokini.
