DIY Black Cat Face Mask [Printable Templates]
Learn how to make a cute cat face mask with our full tutorial. This Halloween mask is a combination of a classic mask and a COVID face mask because it covers your nose and mouth.
How do you celebrate Halloween in a way that's still safe in the time of COVID-19? Combine your Halloween mask with your COVID mask, that's how.
Our exclusive tutorial will show you how to make this DIY Black Cat Face Mask that not only looks cute but will cover your nose and mouth. We have a how-to to walk you through how to make the mask. We also have printable templates for adult and child sizes, so whichever size you need, you're covered.
Even when it's safe to go outside without masks, Halloween in many areas can be chilly, which means this mask can help keep you warm while you go trick-or-treating or walk to your destination.
Because Halloween masks are worn for several hours at a time, we used a super soft t-shirt fabric on the side that touches the face. For the face design, you can have a lot of fun customizing and designing your own mask.
We have a few ideas below but this is the time to get creative. It doesn't even have to be a black cat, as you can use white, gray, brown, or any fabric colors you'd like. It could be a bunny or similar animal, too, depending on how you want to style it. That's the beauty of a custom mask.
Let's get started!

Face Mask Materials Needed:
- 100% cotton black fabric (4 template-sized pieces for a two-layer mask, 6 pieces for a three-layer mask)
- Pink and white felt and fusible interfacing OR hand sewing needle, pink button (for nose), and white embroidery floss (for mouth and whiskers)
- Scissors (and rotary cutter/self-healing mat if desired)
- Sewing machine
- Matching or complementary thread (spool and bobbin for machine)
- Iron and ironing board
- Fabric pins or clips
- Elastic or adjustable earloop bands
- Face mask template (available in different styles and adult/child sizes) or face mask template of choice
- Cat nose, mouth, whisker templates (optional free printable PDF)
- Filter liner - learn about filters here (optional)
Please read about COVID-19 and the latest guidelines from the CDC here.
How to Make a Cat Mask:
Skill Level: Easy
Approximate Time to Complete: About 1 hour
- Print the mask template PDF in the style and size desired. Cut out the mask template.
Note: Read through the tips and details on the template page before printing.
- Using the template, cut out two black pieces for the front of the mask. Cut two additional fabric pieces for the back. If you would like the mask to have three layers, cut another two pieces.
Note: The back fabric can be the same fabric as the front or a different, softer fabric. In this tutorial, the black fabric isn't as soft, so I used a super soft gray t-shirt fabric to be more comfortable against my face.
- Place two template pieces together and pin. Sew along the curved edge to attach, leaving about a 3/8" seam allowance. Lock stitches at the start and end. Cut excess thread and clip curves along the sewn edge. Be careful not to cut the seams. Repeat for all pairs.
Note: This tutorial used black fabric that was the same on both sides, however, if your fabric has a right and wrong side, place the right sides together.
- Open and press the seams to one side for all pieces.
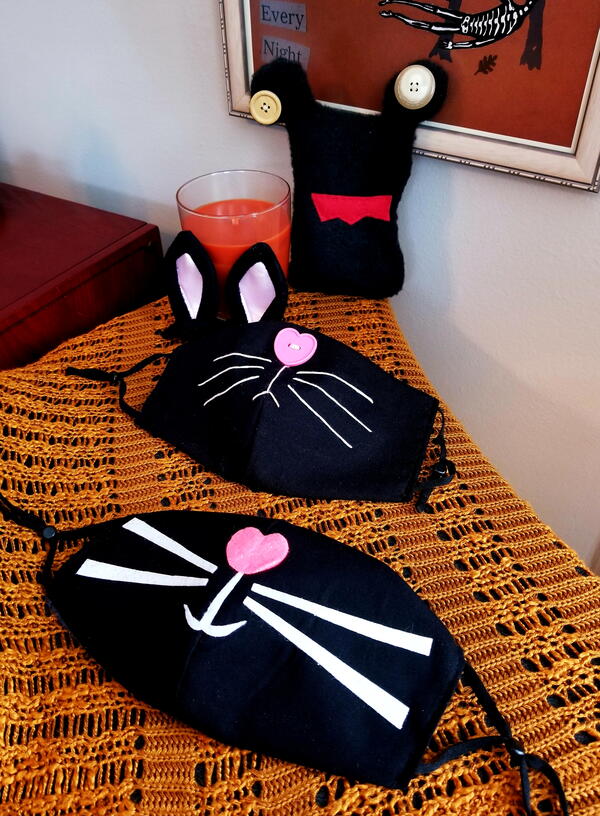
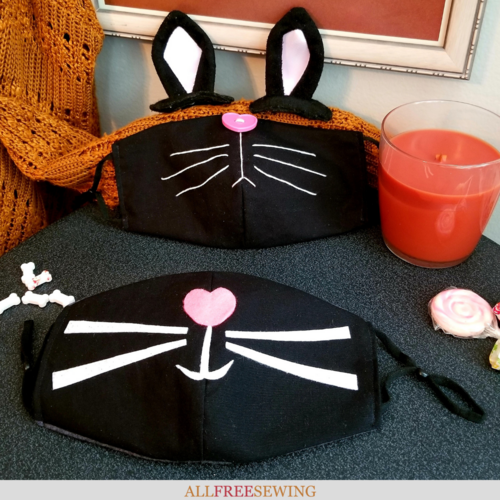
- Decorate the front of the mask by designing a cat nose, mouth, and whiskers. You can use the printable pieces as guides or templates or design your own features. See two design examples below:
- In this example right below, I used glitter pink felt for the nose (cut in the shape of a heart) and white glitter fabric for the mouth and whiskers. I freehand cut the shapes and placed them where it looked best. I then used fusible interfacing to press and secure the felt pieces onto the mask.
- In this example right below, I used a large pink heart button, light pink embroidery floss for the mouth, and white embroidery floss for the whiskers. Again, I freehanded the design for what looked best.
- Add a filter pocket if desired. Put the mask pieces right sides together and pin to secure. You want to line up the middle seams more than the sides. Sew along the top and bottom to attach (again, leave a 3/8" seam allowance). Lock stitches at the start and end.
- Cut excess thread and clip curves along the sewn edges. Be careful not to cut the seams.
- Turn out your DIY mask so that the right sides are showing.
- Press both sides of the mask to flatten seams and remove any wrinkles.
- Fold in sides about 1/2-inch. Sew on elastic (should be about 7" for adults and 5" for children) or adjustable earloops. Lock stitches going over the earloops. You're done!
Note: If your black fabric is anything like mine, you will want a lint roller to remove the debris that has collected!
When wearing, you can add black clothing, a cat-themed hat, ears, a tail, or whatever else you want to complete your look.

