Non-Stick Pan Protectors
Protect your favorite frying pans with this easy sewing tutorial!

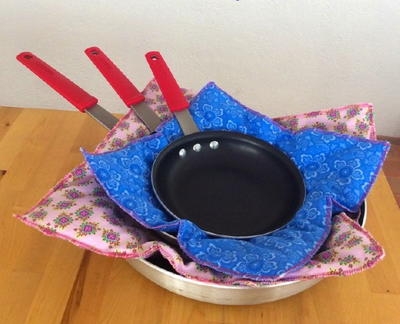
Non-stick frying pans are one of the best aspects of modern cooking but any scratches can lessen their performance in your kitchen. Make sure to protect your favorite frying pans by creating these genius Non-Stick Pan Protectors with this easy step-by-step tutorial! This sewing tutorial is the perfect way to prevent your favorite non-stick cooking tools from getting scratched and is a great organization idea.
The best part about this easy sewing tutorial is that you can easily customize your pan protectors to match your kitchen, meaning they're fun and functional. These kitchen sewing projects are also fantastic if you have an upcoming bridal shower or need to make a quick house warming gift. Protect your pans for years to come with this incredibly useful sewing tutorial.
Project TypeMake a Project
Time to CompleteUnder an hour
Sewn byEither Hand or Machine

Materials List
- Westcott 4” Straight Titanium Bonded Scissors #13866
- Westcott Titanium Bonded Ultra Smooth Spring Assisted Scissors, 9” #14233
- Westcott Self-Healing Cutting Mat 24” x 36” #15352
- Westcott 18” Stainless Steel Ruler #10417
- Fabric
- Quilt Batting
- Stick Pins
- Sewing Thread
- Sewing Machine (optional)
Looking for more great kitchen sewing projects? Then you'll love our ultimate list of potholder patterns that are perfect for your kitchen! How to Make Potholders: 25+ Hot Pad Patterns
Instructions:
-
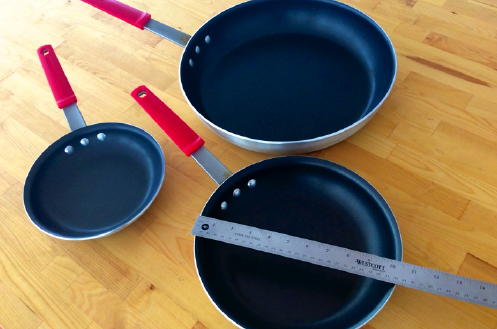
Measure across the width of your pans with the Westcott Brand 18” Stainless Steel Ruler and add 3” to this dimension to determine the size of your fabric and quilt batting for the next step.
-
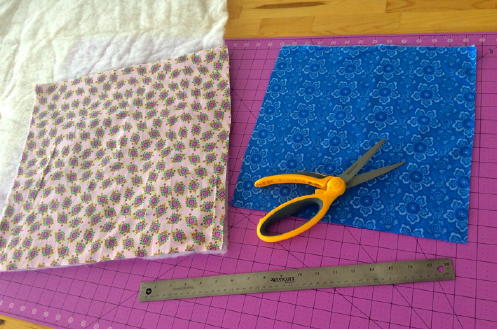
With the Westcott Titanium Bonded Ultra Smooth Spring Assisted Scissors and using the Westcott Self Healing Cutting Mat as a guide, cut 2 square pieces of fabric and 1 square piece of quilt batting for each pan you wish to protect.
-
To assemble each pan protector, pin the piece of quilt batting between the two pieces of fabric, right sides out.
-
With your sewing machine, sew all the way around each pan protector with blanket stitch in a coordinating thread color. If you prefer, you can do the sewing by hand. Lastly, trim away any threads or frayed edges with the Westcott 4” Straight Titanium Bonded Scissors.
Up Next
DIY Kitchen Towel Boa >>>
What kitchen sewing tutorials would you like to see?
Be sure to leave a comment below!


