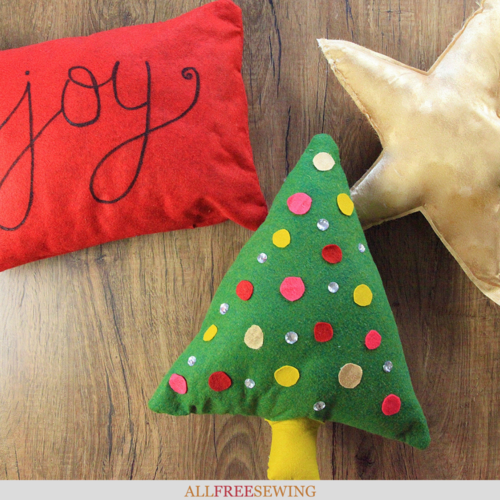
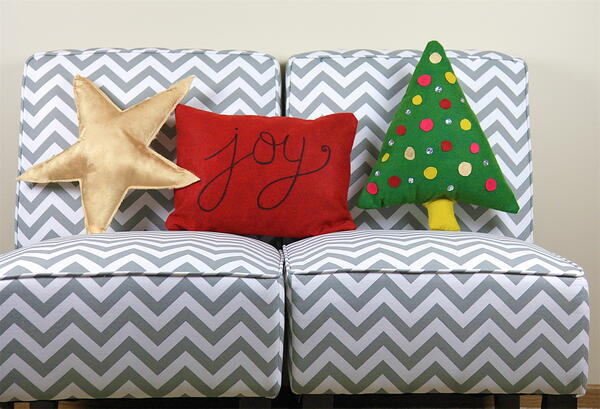
Darling DIY Christmas Pillows in 30 Minutes
Need ideas for sewing Christmas pillows? For the most festive pillows fast, check out these amazing DIY Christmas throw pillows with our full tutorial.

Are you looking for a holiday home decor project? Try sewing these Darling DIY Christmas Pillows in 30 Minutes!
Each simple DIY decorative pillow will take 30 minutes or less to make, using budget-friendly materials like felt.
You can choose between three different designs: the golden star, the Christmas tree, or the joy pillow. Or, in true holiday spirit, try making all three styles to add a truly festive flair to your decor.
No matter which ones you choose to make, these adorable pillows will be lovely additions to your home this winter.
Not only is this DIY Christmas sewing project quick and thrifty, but you can use these ideas to get creative with other concepts or embellishments. The only limit is your imagination and festive spirit. We know you've got this.
Sign Up For More Free Patterns

Darling DIY Christmas Pillows
Materials List:
• Rotary Cutter and Ruler Combo (12" x 12")
• RazorEdge™ Fabric Shears for Tabletop Cutting (8")
• RazorEdge™ Micro-Tip® Easy Action™ Shears (6")
• Felt
• Fabric Marker
• Fabric Glue
• Thread
• Fabric
• Pillow insert
• Pillow stuffing
• Sewing machine
• Basic sewing supplies
Skill Level: Easy
Project Type: Make a Project
Time to Complete: In an Evening
Sewn By: Machine
30-Minute DIY Christmas Pillows Instructions:
DIY Joy Pillow:
- Use the RazorEdge™ Fabric Shears for Tabletop Cutting to cut a swatch of felt slightly larger than the pillow you intend to make, and use a fabric marker to trace and handwrite the word “joy” onto the center of the felt.
These shears are great for making smooth cuts all along the table because of their unique handle design. The fabric will remain flat on the table for improved accuracy.
- Place the Rotary Cutter and Ruler Combo on top of the felt and trim your pillow face to the size you need to cover your pillow. Make sure to account for your seam allowance.
This tool is so easy to use as its all-in-one design allows for quick, accurate cuts. Plus, the grid lines are easily visible on light or dark fabrics.
- Cut a second piece of felt to the same dimensions to create the back to your pillow cover. Pin the pieces together, right sides facing each other, and sew around three sides.
- Turn the pillow right side out and insert your pillow form. Finish the cover by hand stitching the open side closed.
DIY Christmas Tree Pillow:
- First, layer two pieces of green felt on top of each other and fold in the center vertically. Use scissors to cut all four layers of the felt on an angle.
- Cut two small rectangles from yellow or brown felt to make the base of the Christmas tree. Sew the pieces of felt together, leaving a small gap at the bottom to insert stuffing.
- Turn the pillow right side out so that the seams are inside, and add stuffing. Once the pillow has been stuffed, sew the pillow shut.
- Now, it’s time to add embellishments to the pillow with fun colors and jewels. Use the RazorEdge™ Easy Action™ Micro-Tip Scissors to cut tiny circles from various bright colors of felt.
These detail-tip scissors are great for cutting intricate pieces. Adhere the cut felt circles and some jewels onto the pillow using a strong fabric adhesive.
DIY Star Pillow:
- Use your scissors again to cut gold fabric along a printed star template. Two fabric stars will need to be cut for this project.
- Sew around the edges of the pillow and trim off the excess fabric hangover. Keep one side open so that you can insert stuffing.
- Once you have filled the pillow, sew the open side shut.
Want More?
37 Quick Christmas Decorations to Sew >>
What is your favorite part about the holiday season?
Let us know in the comments!

